Leveraging Configuration Transformations in Microsoft Visual Studio
by Ira Endres on Thursday, August 6, 2015
Do you write software? Do you deploy code? If you are not using Configuration File Transformations in your project the next five minutes are going to make you wonder why you have doing it the hard way all these years.
Configuration File Transformations
If you have created a Windows Application or Web Application using Visual Studio in the past decade, you have already been using transformations even if you don't know it. When you create a new desktop, service or web application, Visual Studio creates three configuration files typically stored in the root directory of the project (we will assume web application for now): Web.config, Web.Debug.config, and Web.Release.config. Typically, developers should be using the configuration files for things like application settings, database connection strings and other items that do not change while the application is executing. Most of developers are comfortable putting things in the configuration file and many NuGet packages will modify the file as appropriate for their package, but the build configuration transform files can make deployment and packaging applications much easier if we fully utilize them. First let's summarize the primary responsibilities of the transformation file roles.
Web.config- The primary configuration file. Treat this file as your primary development configuration. Typically this means your development database strings will reside here as well as any settings to enable "debug" features you may have written for your application.Web.Debug.config- This transformation file should contain all of the features enabled to publish or package your application in the debug or development state. For example, if you wanted to deploy to a local development test server and still see stack traces, yourWeb.Debug.configcan be configured this way. In practice, this file usually will not contain more than maybe the destination database connection string.Web.Release.config- This transformation file represents the configuration settings that should reflect your production destination server. It should contain the production database connection string, the live email addresses, appropriate exception handling viacustomErrors, as well as any authentication timeouts and other important security settings. This transformation file should also be responsible for removing any debug-only configurations that are not required in production.
Please note that the configuration file transformations occur only on Package or Publish, not on build.
How Transformation Files Work
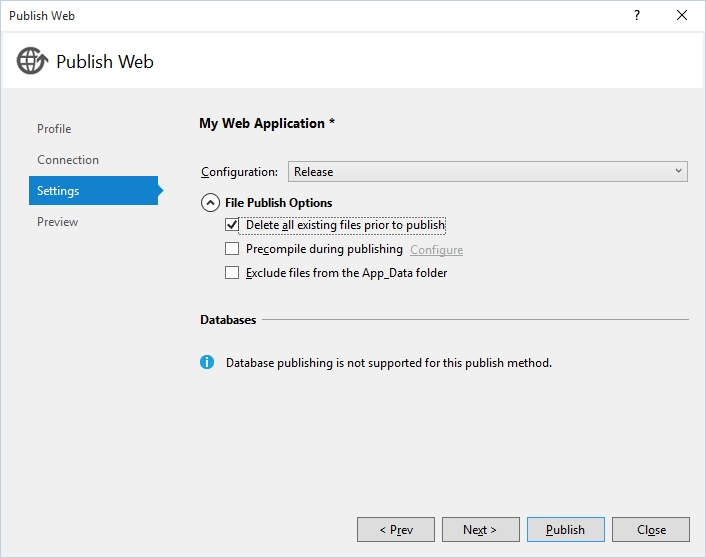
Figure 1 - Select the appropriate Build Configuration for the Publish operation
Let's assume again that we are working on a Web Application. On Publish, Visual Studio will take the Web.config file and use this as the base configuration settings. Then depending on your selected build configuration for the Publish operation Visual Studio will select the configuration file for the selected build configuration and will apply all of the transformations within. It's that easy and it makes deploying your application that much easier.
Debug Example
Let's say we would like to Publish our application to a development test server, which is a different machine than the primary development environment. First, the Web.config is configured to use a database on a local machine and the development test server uses a remote database server. Here is what our files should look like:
Web.config
<?xml version="1.0" encoding="utf-8"?>
<configuration>
  <connectionStrings>
    <add name="DbConnectionString"
         connectionString="server=localhost\SQLEXPRESS;database=MyWebApplication;trusted_connection=true"
         providerName="System.Data.SqlClient" />
  </connectionStrings>
</configuration>
Web.Debug.config
<?xml version="1.0" encoding="utf-8"?>
<configuration>
  <connectionStrings>
    <add name="DbConnectionString"
         connectionString="server=dev-db\SQLSERVER;database=MyWebApplication;trusted_connection=true"
         providerName="System.Data.SqlClient"
         xdt:Transform="SetAttributes"
         xdt:Locator="Match(name)" />
  </connectionStrings>
</configuration>
Notice that in the Web.Debug.config that we have included our updated connection string for the desired database, but we have also included two new attributes specifically for the transformation: xdt:Locator and xdt:Transform.
xdt:Locator- The value in the attribute instructs the transformation script on how to locate the particular XML node in question. In this instance, we are telling the transformation script to look for a node that is nested in the base document (Web.config) where the node is positioned and to match the name of the node to be replaced (Web.config) with the one provided in the transformation file (Web.Debug.config).xdt:Transform- The value in the attribute instructs the transformation script with what to do with the node from the transformation file (Web.Debug.config). Again, in this instance, we are telling the transformation script to replace all the attributes in the base file (Web.config) with the values for each attribute from the transformation file (Web.Debug.config).
A Publish operation in the Debug Build Configuration with these files will effectively prepare the application for a deployment to a development test server and simplify the deploy process by not having to juggle configuration files at deploy time. Another added benefit is that the configurations are able to be checked into the repository and are saved in version control.
Release Example
Let's say we are ready to deploy to production and we have updated our Web.Release.config with the appropriate connection string in the manner specified above. However, there are application settings that are not necessary for Release mode, that are used in Debug mode. No problem.
Web.config
<?xml version="1.0" encoding="utf-8"?>
<configuration>
  <connectionStrings>
    <add name="DbConnectionString"
         connectionString="server=localhost\SQLEXPRESS;database=MyWebApplication;trusted_connection=true"
         providerName="System.Data.SqlClient" />
  </connectionStrings>
  <appSettings>
    <add key="VerboseOutput" value="True" />
  </appSettings>
</configuration>
Web.Release.config
<?xml version="1.0" encoding="utf-8"?>
<configuration>
  <connectionStrings>
    <add name="DbConnectionString"
         connectionString="server=prod-db\SQLENTERPRISE;database=MyWebApplication;trusted_connection=true"
         providerName="System.Data.SqlClient"
         xdt:Transform="SetAttributes"
         xdt:Locator="Match(name)" />
  </connectionStrings>
  <appSettings>
    <add key="VerboseOutput" xdt:Transform="Remove" xdt:Locator="Match(key)" />
  </appSettings>
</configuration>
Notice here that the xdt:Transform attribute is instructing the transformation script to remove entirely the node from the appSettings element matching the value in the "key" attribute.
Adding New Build Configurations and Transformation Files
Have more servers than Debug and Release can handle? Not a problem. Simply open the Configuration Manager (Build > Configuration Manager) and under the "Active solution configuration" drop down list select the "New" option to create a new build configuration. Once you have created a new build configuration, right-click on the Web.config file in the Solution Explorer and select the "Add Config Transform" option and Visual Studio will automatically create transformation files for any missing build configurations.
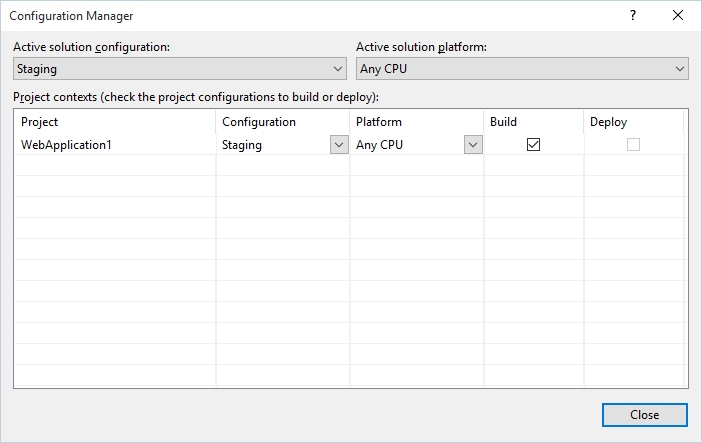
Figure 2 - The Configuration Manager dialog
Conclusion
The configuration file transformation features built into Microsoft Visual Studio are quite powerful and can greatly assist the developer to perform any number of tasks for adding, removing and modifying nodes and attributes inside the application configuration files. Using these features appropriatley can save the developer lots of headaches when it comes time to deploy code for particular environments and servers. For more information on other transformation tasks and available options, see the MSDN articles below in the references.