Continuing with our series on enterprise MVC design patterns, in this article we will look at another common design pattern, paging through data where navigating to the next page requires a round trip to the server to fetch the data. It's a useful pattern because it presents the user with edible chunks of information and allowing them to navigate through large result sets while keeping the data transferred between client and server small. For example, say we had a list of users for a particular system and we want to display the list with additional data about each user. We would want to present that meaningful information to the user via a <table> or grid so they can quickly scan for the information they are looking for.
Username | Email | Enabled | Last Login | Last Updated---------|------------------------|---------|------------|-------------Mary | mary@widgetfactory.com | True | 2014-09-30 | 2014-05-07Bob | bob@widgetfactory.com | True | 2014-09-30 | 2014-01-23Sue | sue@widgetfactory.com | False | 2014-07-21 | 2012-05-03Jane | jane@widgetfactory.com | False | 2014-09-30 | 2013-12-14Tim | tim@widgetfactory.com | True | 2014-09-30 | 2012-10-23For large, complex financial calculations, we would typically create a fully featured report, but for common tasks like user administration, simple data tables are sufficient for management functions. However when the dataset gets large, loading all records for all time isn't very efficient or useful. This is where server-side pagination comes into play.
##Long, long ago in a ASP Web Forms Application far away... DataGridFor those unacquainted, the ASP.Net DataGrid was a powerful, standard Microsoft control that abstracted a wide variety of functionality including table rendering, data management and supported the pagination of data; all the developer needed to do was DataBind() an arbitrary dataset to the DataGrid, and voila! your table was automatically generated. I have no doubt that there was not a single control in ASP.Net that was as so fully featured (or as complicated) as the almighty DataGrid. Utilizing Session data and the Postback model, the DataGrid was the standard tool for data management and abstracted a large portion of low-level controls and events that were created dynamically for the developer.
In modern times, ASP.Net MVC Razor syntax no longer support the DataGrid control, and that is a shame because one of the great use cases for the control was binding paginated data to the control without binding the complete dataset. Put simply, many paginated data table controls need you to bind the entire dataset to the control and then the control will automatically paginate the data. For record sets with millions of rows, this was unreasonable. That's why the DataGrid allowed the developer to load only part of the data at a time, while it still managed the user interface and events for the pagination.
In this article, we will will recreate that server-side pagination model's front-end components by creating a JavaScript library to bind to the <table> to create the pagination controls and initiate a request to the server to reload the data.
##SolutionOur solution will be to create a jQuery UI Widget that will bind to the markup of a <table> element and create the pagination controls dynamically for the developer. This is a tremendous help because this reduces the potential for code duplication by keeping the pagination logic and controls in one place and keep what the developer must do to a minimum. The target location for our pagination controls will be the <tfoot> for the <table> and we want our widget to generate a First button, Previous button, Current Page text box, Total Pages text box, Next button and Last button. We will want our library bind to the button click events as well as to the change event on the Current Page text box to detect when changes occur. Finally, our widget should fire its own change event, passing in the requested page number as a parameter, that the developer must bind to so they can perform whatever operation is required to reload the data from the server.
###PresentationTo render a <table> in HTML, the markup might look something like this: (We will be using for the Microsoft ASP.Net MVC Razor style syntax for this article)
<table id="data-grid"><thead><tr><th>Username</th><th>Email</th><th>Enabled</th><th>Last Login</th><th>Last Updated</th></tr></thead><tbody>@foreach(User user in Model.Users){<tr><td>@user.Username</td><td><a href="mailto:@user.Email">@user.Email</a></td><td>@(user.Enabled ? 'Yes' : 'No')</td><td>@user.LastLogin.ToShortDateString()</td><td>@user.LastUpdated.ToShortDateString()</td></tr>}</tbody></table>That's a pretty table. Notice that the developer in this example has not supplied a <tfoot> element in the container. Our library should be able to detect if the developer included one, and if not, be able to create one so they don't have to.
###WidgetWe will start out with the basic jQuery UI Widget for this article, filling in the required items for the widget factory. Since the pagination will be handled by the server, the widget will need to know two things from the developer: what page we are currently on and how many pages there are. So we will request that the developer pass in two options: currentPage, and totalPages. We also want a way to notify the developer when the page is changing, so they ought to provide a change callback function as well.
$.widget('ui.pagination', {version: '0.0.64',delay: 128,options: {currentPage: 1,totalPages: 1,change: null},_create: function() {}}); ###The _create method
With that now completed, we will need to create our widget's controls binding to the <table> element. First though, we need to check to see if the <tfoot> element is present in our table; if one does not exist, we need to create one.
_create: function() {var that = this;this.element.addClass('ui-table');// check for the footervar foot = this.element.children('tfoot');if (foot.length == 0) {foot = $('<tfoot />');this.element.append(foot);}}Next, we need to create the footer row and container that the controls will go in: the <tr>, <td>, and a <div> container to wrap all the controls together. Now, we have run into an interesting issue; how do we display one <td> over all the columns in the table? Our widget needs to be able to detect how many columns there are in the <table> and then set the colspan attribute value on the <td> to the total number of columns. So how will we count the number of columns?
The _getColumnCount Method
We could just count the number of columns, but we also need to look for the colspan attributes on the columns as well to make sure we are getting an accurate value. To do this, we are going to assume that the developer has created at least the first <tr> with only <th> or <td> elements and that the elements have the appropriate column count and colspan values set. The first <tr> can come from either the <thead> or the <tbody> itself; it doesn't really matter so long as the column count is correct. Our widget will initialize a running total, grab the first row of columns and add the value of the colspan or the value 1 to the running total. We will put this logic, rightfully in its own protected method inside the widget.
// for the given table attempts to count the number of columns_getColumnCount: function () {var tr = this.element.find('tr');if (tr.length == 0)return 1;var columns = 0;$(tr[0]).children().each(function () {var c = $(this);var tag = c.prop('tagName').toLowerCase();if(tag != 'th' && tag != 'td')return;var colspan = parseInt(c.attr('colspan'));if (!isNaN(colspan))columns += colspan;elsecolumns++;});return columns;}Now that we can get an the number of columns that our table is wide, we can create the pagination control container and the pagination controls.
###Creating the ControlsFinally, we can create the <tr>, <td>, and the <div> inside the <tfoot> and initialize the pagination controls.
_create: function() {var that = this;this.element.addClass('ui-table');// check for the footervar tfoot = this.element.children('tfoot');if (tfoot.length == 0) {tfoot = $('<tfoot />');this.element.append(tfoot);}// create the containervar div = $('<div />').addClass('ui-table-page-wrap');var td = $('<td />').attr('colspan', this._getColumnCount()).addClass('ui-table-page');var tr = $('<tr />');tfoot.append(tr.append(td.append(div)));//create the controlsvar b_template = '<button />';var t_template = '<input type="number" />';this.pagination = {first: $(b_template).button({ icons: {primary: 'ui-icon-seek-first'}, text: false }),previous: $(b_template).button({ icons: {primary: 'ui-icon-triangle-1-w'}, text: false }),current: $(t_template).val(this.options.currentPage),total: $(t_template).val(this.options.totalPages).attr('readonly', 'readonly'),next: $(b_template).val('>').button({ icons: {primary: 'ui-icon-triangle-1-e'}, text: false }),last: $(b_template).val('>>').button({ icons: {primary: 'ui-icon-seek-end'}, text: false })};// append the controlsdiv.append(this.pagination.first);div.append(this.pagination.previous);div.append(this.pagination.current);div.append('<span>of</span>');div.append(this.pagination.total);div.append(this.pagination.next);div.append(this.pagination.last);}###UI Events
Next, we will register the events. As the events will be manipulating the values we received from the initialization options, we will need to store them in a mutable space. For this, we will utilize the jQuery data method on the initializing UI element. This will provide us safe storage to play with these values across the events. After initializing those values. we will need to manipulate the current page value for each event (with bounds checks). Finally, each event will make a call to a change event on our widget to notify the callback that the pagination controls have been updated.
_create: function() {...// initialize data valuesthis.element.data('currentpage', this.options.currentPage);this.element.data('totalpages', this.options.totalPages);// bind the click and change eventsthis.pagination.first.click(function() {var i = that.element.data('currentpage');if (i == 1)return;that.element.data('currentpage', 1);that.change();});this.pagination.previous.click(function() {var i = that.element.data('currentpage');if(i == 1)return;i--;if(i < 1)i = 1;that.element.data('currentpage', i);that.change();});this.pagination.current.change(function() {var c = $(this);var i = parseInt(c.val());var p = that.element.data('currentpage');var t = that.element.data('totalpages');if(isNaN(i) || i < 1 || i > t || i == p) {c.val(p);return;}that.element.data('currentpage', i);that.change(); });this.pagination.next.click(function() {var i = that.element.data('currentpage');var t = that.element.data('totalpages');if(i == t)return;i++;if(i > t) {i = t;}that.element.data('currentpage', i);that.change();});this.pagination.last.click(function() {var i = that.element.data('currentpage');var t = that.element.data('totalpages');if (i == t)return;that.element.data('currentpage', t);that.change();});}###The change EventNow all that is left is to create a change event on our widget is to make a callback to a user-provided function with our change request data. This is relatively straight-forward with the jQuery UI Widget framework. We want to first check if the developer provided the change callback and if so call the function with an event data object as a parameter that contains the requested page.
change: function() {// check if the options callback is set.if (this.options.change == null || this.options.change == undefined)return;// call the callbackvar currentPage = this.element.data('currentpage');this.options.change({ currentPage: currentPage });}###Proceeding with StyleBecause we created class handles on the container and wrapper, we can perform some additional simple styling to the control to make the content more visually appealing. With just a few CSS declarations, we can center, size and space the controls evenly in the parent container.
<style type="text/css">.ui-table-page {text-align:center;}.ui-table-page input[type=number] {width:45px;margin:3px;}.ui-table-page span {margin:3px;}.ui-table-page-wrap {display: inline-block;}</style>Our pagination controls are now awesomely styled and fit well in the table with the jQuery UI theme, but if you haven't styled the table yet, you can apply additional class names to the table's content and headers to fit the theme as well. To do this, we will create one more protected method on the table to add the class names to the desired elements. This protected method should be the final method call in our _create method so that the elements our widget created will be included as well.
_applyStyles: function() {this.element.find('th').addClass('ui-state-default');this.element.find('td').addClass('ui-widget-content');}Also, some CSS to fix the border collapse and padding inside the elements.
.ui-table {border-collapse: collapse;}.ui-table th, .ui-table td {padding:3px;}##Final ScriptNow to bind our new jQuery Widget to our Razor syntax model, the View will render the table and our pagination widget will populate the page navigation controls. Here our model contains 3 public properties: Users which is a list of User objects, CurrentPage which is the integer value of the current page, and TotalPages which is the total number of pages of data to navigate through. Our final Razor syntax code with jQuery Widget instantiation looks like this:
<table id="data-grid"><thead><tr><th>Username</th><th>Email</th><th>Enabled</th><th>Last Login</th><th>Last Updated</th></tr></thead><tbody>@foreach(User user in Model.Users){<tr><td>@user.Username</td><td><a href="mailto:@user.Email">@user.Email</a></td><td>@(user.Enabled ? 'Yes' : 'No')</td><td>@user.LastLogin.ToShortDateString()</td><td>@user.LastUpdated.ToShortDateString()</td></tr>}</tbody></table><script type="text/javascript">$('#data-grid').pagination({currentPage: @Model.CurrentPage,totalPages: @Model.TotalPages,change: function(e) {var currentPage = e.currentPage;// TODO: Do something with the current page value}});</script>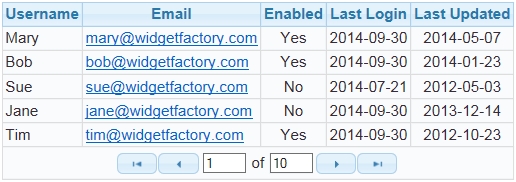
Figure 1 - Table with Pagination Controls added dynamically with a jQuery Widget
##Conclusion
Gone may be the glory days of Microsoft's DataGrid control, but for enterprise MVC web applications, server-side pagination of data is still a relevant and important pattern to emulate. In this article, we have tackled one of the important components in a server-side pagination model, the front-end pagination controls. By creating a jQuery UI widget that will dynamically create the controls, bind the events and simplify the amount of code the developer has to write, we have abstracted a large portion of developer time and code complexity allowing the developer to focus on the important tasks at hand.
We hope you enjoyed this article on our series of enterprise MVC design patterns. Feel free to connect with us on Facebook, Twitter, and Linked In to stay up to date with Cosairus.