##OverviewIn this article, we are going to focus on the ability to dynamically set the Connection String for your Entity Framework Model. We will be focusing our efforts in the most recent version which as of this writing is Entity Framework version 6.1.2 in Visual Studio 2013.
In scenarios such as database sharding, archiving, or other types of segregation of data it may be necessary to programmatically change the connection to store records using the Entity Framework Models on a different database server. To my surprise MSDN provided several examples on how to create the Connection Strings, but provided little else in sample code to show you how to actually use the Connection Strings and how to configure the various components. We will step through the process of creating a helper class to create the Connection String and then access the database context with the generated Connection String.
##The Entity Framework Connection String Breakdown
metadata=res://*/Model.EFShardModel.csdl|res://*/Model.EFShardModel.ssdl|res://*/Model.EFShardModel.msl;provider=System.Data.SqlClient;provider connection string="Data Source=localhost\\SQLEXPRESS;Initial Catalog=EFShardExample;Integrated Security=True;MultipleActiveResultSets=True;Application Name=EntityFramework"As generated for the developer by Visual Studio Entity Designer, the Connection String has 3 main properties: the Connection String Metadata, the Provider type and the Connection String. In this case we will be using an instance of Microsoft SQL Server so the Provider property will be the SqlClient which is the default for these database-generated entity models.
To learn more about Connection Strings in ADO.NET, check out this MSDN on Connection Strings
###Metadata PropertyBy default the Entity Framework EDMX files Build Action is set to Entity Deploy which generates cs files with classes based on the XML schema generated from the database. In addition, three meta data files are created with the extensions csdl, ssdl, and msl and are embedded into the assembly that is generated upon completion. To instantiate a new Entity Model, the DbContext searches for the meta data files for the purposes of model validation and serialization.
Each file is separated by the | pipe character and begins with res://[NAME_OF_ASSEMBLY_FILE]/[FOLDER_PATH]/[ENTITY_MODEL_NAME].[csdl|ssdl|msl]. The [NAME_OF_ASSEMBLY_FILE] can be replaced with the * wildcard to search in all available assemblies.
###Provider PropertySimply the full namespace name of the connection library to use. For Microsoft SQL Server, this will always be System.Data.SqlClient.
###Provider Connection String PropertyThis is our normal Connection String with our actual connection information: Data Source, Initial Catalog, Integrated Security, User ID, Password and so forth. In the App or Web configuration files, the Connection String is wrapped by " but in our application code we will be using actual quotation marks.
##Project Setup
To get working with the core components, we need to setup a sample database and project solution so we can sandbox the Programmatic Connection Strings with the Entity Framework.
###Database Structureuse [master]GO
create database [EFShardExample]GOuse [EFShardExample]GOcreate table [KeyValuePairStore] ([ID] uniqueidentifier not null constraint [DF_KeyValuePairStore_ID] default newsequentialid(),[KEY] nvarchar(32) not null,[VALUE] nvarchar(256) not null,constraint [PK_KeyValuePairStore] primary key ([ID]))GO###Create the Visual Studio Solution
- Open Visual Studio and create a new Class Library named
EFShardExample - Create a new Unit Test Project in the solution and name it
EFShardExample.Tests - Create a new folder in the
EFShardExampleproject and name itModel - In the
Modelfolder create new ADO.NET Entity Data Model and name itEFShardModel- Select the
EF Designer from databaseoption - Create a new connection to your database instance and point it to the
EFShardExampledatabase - Select to Add the connection string to the
App.Config - Add the
[KeyValuePairStore]table to the model and Finish
- Select the
- Add the
EFShardExampleproject as a reference in theEFShardExample.Tests- You may also need to add the Entity Framework files via NuGet Package Manager and the
System.Data.Entityassembly to the test project
- You may also need to add the Entity Framework files via NuGet Package Manager and the
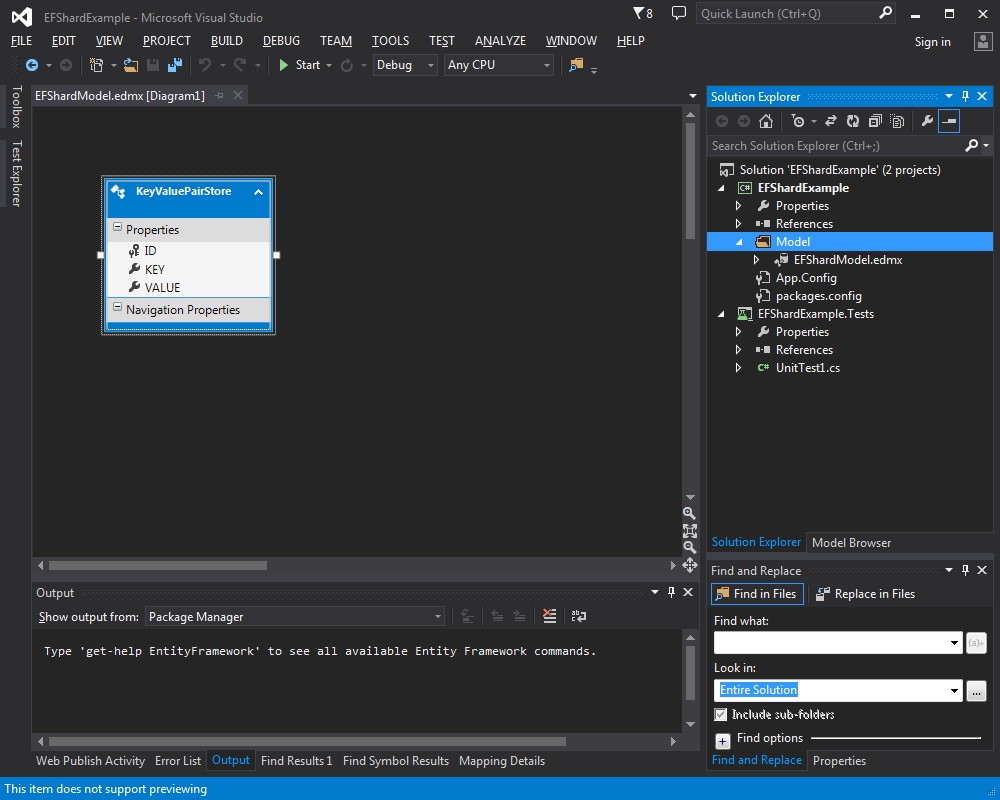 Figure 1 - Hopefully this is how your solution looks once these steps have been completed.
##ConnectionHelperFor simplicity, we want to create a class that given the required properties will return an instantiated database context that is the entities we are hoping to connect to. First we will build the Connection String and then we will create the connection. Let's create a class in the EFShardExample project and call it ConnectionHelper.
On ConnectionHelper, we will want to create two functions, one to create the Connection String and one that will return an initialized database context. Since we will be using Microsoft SQL Server, we will assume that the provider will always be System.Data.SqlClient. For simplicity, we will also assume that we will be using Integrated Security however this could easily be refactored to use any combination of Integrated Security or User Mode.
public class ConnectionHelper{public static string CreateConnectionString(string metaData, string dataSource, string initialCatalog){throw new NotImplementedException();}public static EFShardExampleEntities CreateConnection(string metaData, string dataSource, string initialCatalog){throw new NotImplementedException();}}###Create the First Unit TestsBefore we get to coding any further, we will go ahead and create Unit Tests to determine how we expect the code to work. We will create two unit tests, one for each function.
[TestClass]public class ConnectionHelperTests{protected string metaData = "res://*/Model.EFShardModel.csdl|res://*/Model.EFShardModel.ssdl|res://*/Model.EFShardModel.msl";protected string dataSource = "localhost\\SQLEXPRESS";protected string initialCatalog = "EFShardExample";[TestMethod]public void ConnectionHelper_CreateConnectionString(){string connectionString = ConnectionHelper.CreateConnectionString(this.metaData, this.dataSource, this.initialCatalog);Assert.AreEqual("metadata=res://*/Model.EFShardModel.csdl|res://*/Model.EFShardModel.ssdl|res://*/Model.EFShardModel.msl;provider=System.Data.SqlClient;provider connection string=\"Data Source=localhost\\SQLEXPRESS;Initial Catalog=EFShardExample;Integrated Security=True;MultipleActiveResultSets=True;Application Name=EntityFramework\"",connectionString);}[TestMethod]public void ConnectionHelper_CreateConnection(){using (EFShardExampleEntities dbContext = ConnectionHelper.CreateConnection(this.metaData,this.dataSource,this.initialCatalog)){dbContext.KeyValuePairStore.ToList();}}}Notice that in our assert statement that we are using actual quotation marks instead of the ".
###Creating the Connection StringThe .NET Framework provides several helper classes to create new Connection Strings: SqlConnectionStringBuilder and EntityConnectionStringBuilder. We will utilize these to create the resultant Connection String from our helper class. Again, we will assume that Integrated Security is enabled and that we will be only using a Microsoft SQL Server database.
public static string CreateConnectionString(string metaData, string dataSource, string initialCatalog){const string appName = "EntityFramework";const string providerName = "System.Data.SqlClient";SqlConnectionStringBuilder sqlBuilder = new SqlConnectionStringBuilder();sqlBuilder.DataSource = dataSource;sqlBuilder.InitialCatalog = initialCatalog;sqlBuilder.MultipleActiveResultSets = true;sqlBuilder.IntegratedSecurity = true;sqlBuilder.ApplicationName = appName;EntityConnectionStringBuilder efBuilder = new EntityConnectionStringBuilder();efBuilder.Metadata = metaData;efBuilder.Provider = providerName;efBuilder.ProviderConnectionString = sqlBuilder.ConnectionString;return efBuilder.ConnectionString;}###The Step They Didn't Tell YouNow your Entity Model extends from DbContext and DbContext provides a constructor to pass in a Connection String, but your Entity Model does not overload those constructors for you. In order to access the constructor overload, you will need to create a new class partial for your Entity Model database context in the same namespace as your Entity Model with the required constructor signature. Pro Tip: be sure to name the filename of the cs file a different name than the Entity Model database context in the event that future generated code does not overwrite your changes.
namespace EFShardExample.Model{public partial class EFShardExampleEntities{public EFShardExampleEntities(string connectionString): base(connectionString){}}}Once created, you will now be able to create a new Entity Model and pass in a Connection String for your destination database.
###Create ConnectionNow creating the connection is as simple as instantiating a new Entity Model with the Connection String from our helper function.
public static EFShardExampleEntities CreateConnection(string metaData, string dataSource, string initialCatalog){return new EFShardExampleEntities(ConnectionHelper.CreateConnectionString(metaData, dataSource, initialCatalog));}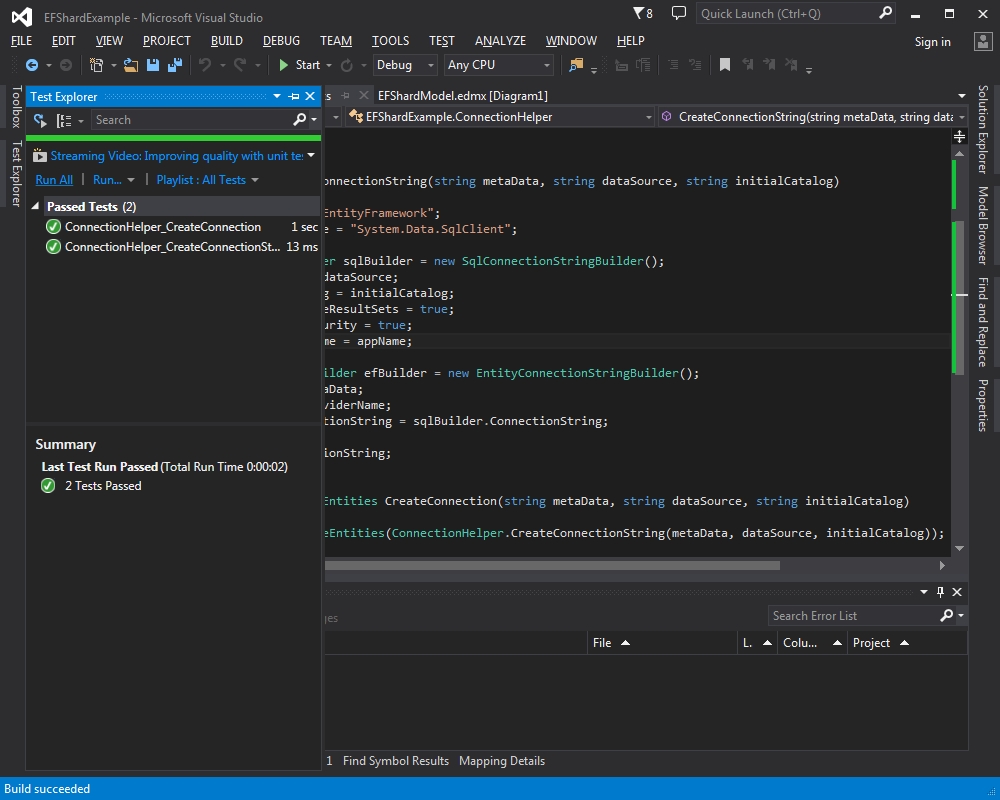 Figure 2 - The Unit Tests are all green!
##ConclusionIn this article we created a sample database and a helper class to dynamically create an Entity Model database context with a specific Connection String from its Connection String parts. This is useful for applications that have distributed systems that may involve sharding, archiving, or other forms of data distribution. We hope this article was informative and may have answered questions on how to perform this task (because it sure caused me a headache).